Sunday, November 22, 2015

New Necklaces

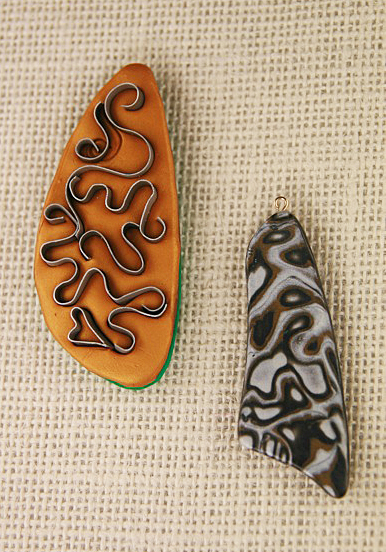
As you know, I make a lot of pendants, just not a lot of necklaces.  I think it's partly because pendants can be made up quickly and when I try a new technique, I'm eager to see what it looks like translated into jewelry.  Every once in a while, though, I make beads that want to be strung together into a necklace.  So today, I thought I'd share two pieces I just finished making.
The first piece was made from an Ikat Skinner Blend.  The pearls and gold seed beads seemed the perfect compliment.

The other necklace has a series of wavy discs cut from a translucent cane wrapped in solid cream polymer.  The translucent clay was colored using embossing powders, so there is a textured look to the pieces.  Small glass "O" beads separate the discs.

Thursday, November 19, 2015

Making Gilded Leaf Pins

This past weekend, I had the pleasure of taking a workshop from Diane Villano.  Diane is a member of the Southern Connecticut Polymer Clay Guild, and has written several articles in various polymer magazines.  She was offering a workshop on imprinting leaves into polymer.  I've made leaf impression pieces in the past, but Diane had an approach that looked different from what I had done before, and I wanted to learn about her technique.

As usual, Diane was organized and had great directions.  The workshop was fun and the process easily produced results that made the participants pleased.  In the photo at the left, the piece with all the metallic colors in the middle is the piece I made in class.  The other two were pieces I made a couple of days later at home.

These have convertible pin/pendant backs so they can be worn as a pin or hung on a chain.  Diane had us work on black clay because she likes the effect the black clay provides.

I decided to see what the process looked like on colors, so made two pendants, one on a teal backing and one on copper.  The pieces on the right show the results. The look is a bit different from the black clay pieces.  It seems the black adds more contrast and intensity.  It probably all boils down to personal preference.

Either way, the effect is very pretty.  Of course, fall, after the leaves are off the trees, is not the best time to try this project.  I plan to re-visit the process in the spring with new leaves and more shapes.

Wednesday, October 28, 2015

Transfers: Shimmer & Shine


As I mentioned in my first posting about transfer images on polymer, I had a couple of ideas of ways to enhance the transferred images.  This post shows my first idea.  I wanted to add a bit of shimmer and shine to the images. PearlX powders seemed like a good idea - and I'm pleased with the results.


This process was done before the clay was baked.  I tried putting on a light coat of the powders over the unbaked image, but too much of the picture was occluded. So, I tried a different approach to application.  I used a small, flat brush to apply PearlX powders to the sides and back of the pieces.  I protected the center surface of the piece from fingerprints, then applied the powders along the edges of the piece.  The resultant "overflow" of powder landed on the surface, and created just the right amount of shimmer and shine without hiding the image underneath.

I think you can really see the difference between a "plain" transfer and one using the PearlX powders in these two white pieces.  The piece on the right has the powders added, and it not only shimmers -  the pendant almost looks like a light snow is drifting by.  I sealed the pieces with Magic Gloss resin which gives them added dimension and helps make the powders look 3-D while protecting the finish.
One of the things I like about the powders is they can make a subtle color change occur in the image. For example, the earrings at the top of this photo have yellow flowers, but the use of an interference green powder makes the flowers look lime green from certain angles.  


Notice, in this last set at the right, there appears to be a green cast at the top of the pieces and a dark rust brown cast at the bottom.  Once again, the PearlX powders added their own twist to the finished product.


Sunday, October 25, 2015

Ikat Three Ways

I've just returned from New Mexico where I had a fantastic time in a sculpture and armature workshop with Kate Church.  Once I finish the pieces I began, I'll post photos and tell you more!  Until then, I've other things to share.

Right before I headed to Albuquerque, I presented a workshop on Ikat techniques.  I showed the participants a few different methods for achieving the Ikat effect.  I thought I'd share some of the pieces I made from canes I developed as part of my demonstrations.  Judging from their Ikat stacks and the products students made, everyone was very successful!

The set to the left was made from a 3-color Skinner blend with white strips of clay set on top to add contrast.  The blend was then cut up and the piece were off-set making a nice stack. I cut slices from the stack and used a thin bamboo stick to draw the feathered pattern on the clay.  Rolling the pieces through the pasta machine enhanced the look.  The picture on the right shows a similar feathering pattern applied to an Ikat stack with multiple color stripes.
These pieces in purple, orange and fuschia were made from an Ikat stack made from medium thick logs of clay set up in a specific pattern.  You can see the set up online  at Polymerclaycentral.com. The earrings and the pendant between them have been further enhanced with some tiny dried flowers, then covered with Magic Gloss.  the other pendant has a satin finish, made by sanding and buffing after baking.  Also, you'll notice one pendant has the feathered design while on the other I left the Ikat design alone.

The green set was made from a 2-color Skinner Blend that I did not reduce as much as the other stacks I made.  Again, I decorated with the little dried flowers and sealed the surface with the Magic Gloss resin.


The brass cuff bracelets below were covered with twisted and swirled snakes made from the various Ikat stacks.  I love the way the colors and textures interact.


This last photo has a few pieces made based on a technique that Lindly Haunani uses for Ikat stacks.  She has a great class teaching leaves using this technique on CraftArtEdu.  If you like the Ikat look, her class is excellent.


Wednesday, September 30, 2015

Transfers ~ My First!

I'm sure many of you have done all sorts of things with transfers.  I'm referring to taking a printed image and transferring it to polymer to be used in a variety of ways.  I did try the process myself a couple of years ago, but didn't have much success.  I tried a variety of printers, papers and processes, and nothing seemed to come out just right.  So, I figured perhaps it wasn't "my thing."  After all, there are soooo many techniques and processes you can do with polymer, not doing one wasn't the end of the world....Or was it?

The impetus to try again came the other day when I ran across some really lovely digital images on Etsy.  I was particularly taken with fall leaves - so appropriate for this time of year - and with some Japanese style art.  So, I decided to give transfers a try again.

I'm so glad I did!

You'll see sprinkled about this post the first pieces I've made. The images came out sharp and clean and I'm quite pleased with the results.  The two pendants to the right I mounted on another sheet of clay.  The red leaf image has a Magic Gloss resin finish while the pendant on the left has a light protective coat of Preserve Your Memories II.


The process:  I used my laser printer and digital images purchased with "permission to use" rights.  You'll find all sorts of images that can be used legally on the Internet, and Etsy is an especially great source.  Some of the images in original form were too large or too small, so I used my computer to alter the size.  I printed the images on a good quality copy paper, but nothing fancy, thick or special.


My base clay is a combination of white and translucent.  I did a lot of finger rubbing with good pressure accompanied by using rubbing alcohol to dampen the paper but not get it soggy.  The process takes a little while, but when the paper peels off completely white, and the image is on the clay in all its original glory, it's quite a thrill.

 You do have to use the clay pieces pretty quickly, since the image and the clay are tacky.  The baking process really seemed to seal the image to the clay.


 I have some more ideas about ways to use or enhance transfer images, so keep checking back.

Monday, September 28, 2015

Alcohol Inks & Micro-fine Glitter Dust

When I set out to make the sheets for these pieces, I had something else in mind. Though the result was not what I had expected, it turned out to be a lovely surprise.  If you could hold these pieces up close, you'd see that the colors seem to float above the polymer base.  The colors don't have defined edges, rather they blur and blend together.
The sheet stack consisted of a base of pearl clay, a layer of gold composite leaf, a thin layer of translucent polymer, and a "sprinkling" of white pearl micro-glitter.  I then colored the short stack with alcohol inks.   I didn't realize that I'd used a bit too much micro-glitter on the surface, so the colors melded some during baking.  Then, when I used Magic Gloss to seal the surface, some of the alcohol ink-imbedded glitter rose from the background and mixed with the gloss.  The look is really sparkly and the colors seem to glow.    I like the way these turned out.  Now my question is whether I can actually reproduce the effect...

Saturday, September 26, 2015

Gold leaf, Mauve & Blue Mokume Gane

It's been a busy month - busy with everything except working with polymer.  I was finally able to put aside a block of time or two, and have some new things to share.  I wanted to do something that picked up the bits of gold we are starting to see in the trees here in New England.  I decided to use the hills and valleys mokume gane technique with translucent polymer mixed with two of the new colors for fall - Cashmere Rose and Biscay Bay.  I started with the rose shade, and imbedded the pieces with gold electroplated glass seed beads for a bit of contrast.  The first photos shows some of the pieces I made.

On to blue!  Here are 2 pendant and earring sets. I especially like the motion of the multiple pieces. Sometimes doing something fairly simple adds a lot of interest to a piece.


Finally, I made a few brass cuffs.  I tried a green but didn't get the shade I was looking for.  It looks like it will be better for spring than fall.  

Wednesday, August 26, 2015

Extruding in the 'Round

A couple of weeks ago, I taught a workshop using polymer extrusions.  The workshop was designed to  teach the technique I described in my blog post of May 25, 2014. I call it "extruded mokume gane" since the extruded design is shaved in mokume gane style and the result is 2 different flat sheet looks.

At this particular workshop, the group was doing quite well with the process, so I decided to also show them how to make round beads using the extrusions and the mokume gane technique.  Here is a bracelet made using a set of beads made this way.  The extruded snake is wrapped around a scrap clay core.  A tissue blade is used to cut off small pieces of the snake.  This reveals the colors and layers underneath.  A gentle hand rolling helps reform any beads that might have gotten distorted in the process.


Here is another set of extruded, shaved beads in a different color palette.


The rest of the photos show one of the extruded snake designs after the top layer has been shaved, and a purple sheet of clay with pieces from the shaved design.

 Finally, here is a picture of a pendant piece made from the sheet.  A different base color would create a very different look.


Saturday, August 1, 2015

New Earring Style for Striped Canes

I have a few striped cane ends sitting around.  They are small, so I can't do a lot with them.  Playing with one of them the other day, I started making little round beads.  I flattened them slightly - for no other reason than I was curious what they would look like.

I liked the flattened beads, and began experimenting with different designs.
Earrings seemed best, since the cane supply was limited.  The photos here show some of the little earrings I made.   Making the stripes come together on each side took the most time.


While I was playing with stripes, I decided to make a few more wrapped bracelets.   These are such fun to wear, and I love the summery colors.

Wednesday, July 22, 2015

Master Class Camp 2015 - Colors the Haunani Way

Ah, I adore color.  It's one of my favorite things about using polymer.  And I especially love the way Lindly Haunani leads you to find your own color-way, exploring options along the way.   For me, there is something that just clicks in the way she presents color.  Step by interesting step, Lindly helped us evaluate tones, hues, and saturations, until each person in the 2-day workshop had developed a rainbow palette that was a personal "fit."

We started by choosing photos from magazines that appealed to us and making them into a collage.  Although the pile of pictures was the same for everyone, people naturally gravitated in different directions, and the collages were all distinct and unique. Here's a snapshot from mine.

Next, Lindly helped each of us determine the appropriate primaries for making our own personal rainbow Skinner blend. It was fun to see how different the various rainbows were - and everyone seemed pleased with their results.

We developed a few canes based on our blends, and then used those canes to create beads.  The pile of beads to the left are some of mine.


This next photo shows some of my beads laid on top of my collage. How's that for a match!!


Finally, we fashioned the beads into a fun bracelet.

One of the things I found especially wonderful and intriguing about this class is that the process can be used over and over again and, depending on the season or my mood, my color choices will shift and alter a bit. Yet, I know that given a collection of items based on multiple personal collages (mine), there would be a color way that would stand out as being just "me."  How lovely!

Sunday, July 19, 2015

More Master Class Camp with Eugena Topina

After having spent 2 days with Eugena Topina making those amazingly versatile stamping tools, I was pleased to have a second class with her.  Due to personal circumstances, one of the scheduled presenters was unable to attend, and Eugena graciously offered to teach a class to fill that void.  I'm delighted she did!  This class was a brand new one for Eugena, and took us off on an adventure with organic shapes and textures.  I've not done much work with organic shapes, so this class really helped me try something new.  Keep an eye on her website:  http://www.eugenascreations.com/  I'm sure she'll have a new tutorial for this process soon.  It's really fun and creative!
We started with white clay, though we could have used colors if we wished.  Knowing we would be colorizing things later was a good reason to stay with pale colors or white, especially for our initial experience with the process.    Eugena guided us through shape formation and introduced us to a myriad of texturing techniques.  Every design and texture in the pieces you see here was made by hand, following methods that Eugena has developed.  Most of them used everyday tools or items that would be easy to find.  Eugena is very imaginative.  The results were amazing and the whole process was a lot of fun!

After making several of the rounded shapes, and playing with various texture concepts, we experimented and created some shapes of our own.

On the second day of class, we dove into colorizing our pieces. As you can see in the last 2 photos here, I tried some organic shapes of my own and had a grand time with colors!  Thank you, Eugena, for a great class!

Friday, July 17, 2015

Master Class Camp 2015 - Learning Something New!

I've just returned from Laurel, Maryland, where I attended Master Class Camp 2015.  Camp is composed of a series of two-day workshops with some outstanding polymer artists as instructors.  I was fortunate to take classes from both Eugena Topina and Lindly Haunani.  I had a great time, learned much, stretched my thinking, and pushed beyond my comfort zone a bit.  I'll be posting samples of my work from their classes over the next few days.

The first class I took was with Eugena Topina.  She has some excellent tutorials available online, and I was delighted to have this opportunity to meet and work with her.  This class focused on the development of a "stamping" tool.  It was the first time I've taken a workshop for the development and design of a tool, and I found the idea - and the process - fascinating.  Since this class is also available as a tutorial, I will not go into detail on how the stamping tools were developed.  Here, I have photos of some of the stamping tools I developed in class with an example of an application possible with the tool.  I definitely plan on making more of these tools and using them in my creations.
                                                                        To the left is a piece using one of the tools I made and demonstrating the mokume gane technique.                                                                                Below are two additional examples of tools used to create unique designs.


Wednesday, July 1, 2015

Striped Rounds with Malachite

Here's a fun little necklace I just strung together.  I was playing with a multi-striped cane and got caught up in making these little round beads.  I should have saved one so I could show you that the stripes meet in the center on each side of the rounded beads. This means they could be used on their sides, too.  I'll have to give something a try and show you at some future date.  The 3mm malachite rounds match one of the stripes perfectly, and the little silver heishi between the beads add just a touch of shine.

Right now, I'm getting things together for a trip next week to Baltimore for the Polymer Master Class Camp 2015.  Six days of classes with outstanding polymer instructors. Nothing to do but learn and play and experiment.  Really looking forward to it!  More when I get back.

Sunday, June 28, 2015

Some recent - and updated - projects

I've been off on a bicycle touring vacation in Minnesota and Wisconsin - pretty country.  We're home now, and I've had a chance to get back to some polymer.  I miss having my "fingers" in the clay when I'm away from home, and it feels good to be making some pieces, and augmenting others.
Just yesterday, I taught a workshop on painting polymer with Pearl-x powders.  We had as many different results as we had participants, and everyone had a good time experimenting and learning.  Here are a couple of pieces I made as part of my demonstration.  On the red clusters with bronze stems pieces to the left, I used a micro-pearl for the background.  These pieces I finished with Magic Gloss.  The next set with the basket weave pattern was finished with several sprays of Preserve Your Memories II.The two finishes make the pieces look quite different.  The Magic Gloss adds a depth that looks like a piece of glass. This creates a really shiny surface that seems to distort the background slightly.  The PYM II makes a shiny satin finish that leaves the colors and textures clear.  It certainly is a matter of personal preference.

While I was using the Magic Gloss, I decided to finish up a few mosaic pieces I'd made a while back and hadn't finished.  Each of these pieces now has a layer of Magic Gloss.  On the mosaic pieces, the gloss adds depth but there is no distortion of the design - probably because the design is so specific and sharp.

The last photo is another mosaic piece that still needs "grout" and a final finish.  I really like the colors in this one.

Both of these techniques are a lot of fun.  They are time consuming in some ways, though I find that I get caught up in the processes and don't notice the time it takes.