Tuesday, December 25, 2012

Vines & Floral "Cameos"

Cameos seems an appropriate name for this new line of mine. Though not actually carved, as the original cameo pieces were, these do have a raised design with a contrasting background.  The two-tone color scheme helps accentuate the design.  I may try more color in the future, but this simple contrast design just seemed right.  It is, after all, winter, and the colors outside are often in stark relief.  The black pendant and red earrings are the first pieces I made.  I tried more daisies and vines in teal and one on a swirled background.
Then I decided to try just vines.  I love the way the tiny snake of clay curls and curves as it leaves my hand, sometimes seeming to have a mind of its own.  These are longer, more slender shapes and seem perfect for vines. The larger anique gold piece has a pearl and faceted jet piece dangling from the bottom.


This last grouping shows 4 pendants in different shapes, all sporting vines with tiny roses.

Hope you've enjoyed this "walk" through a winter garden.

Monday, December 3, 2012

Tiny Flowers "Sculpted" with Polymer

Oh, I like this style!  I've seen pictures a couple of times showing sweet little flowers made using tiny bits of clay.  I decided to try it myself.  Of course, being on a cylinder kick meant I had to try it as decoration on a couple of the long tubes.  The teal pendant was my first piece - and so far, it's my favorite.  It was very time consuming to form the tiny pieces of clay and attach them to the base.  I found I really tuned everything else out while I was making the various shapes.


The purple pendant is large - almost half again as long as the teal piece.  It seemed to need more decoration, too.  I baked the core first, then used Genesis Thick Medium as a bond to hold the tiny flower pieces to the base.  I've rubbed the pieces pretty hard since baking, and the bond seems quite strong.

One more cylinder pendant to share.  This one is more sculptural and along the lines of other embellishments I've done in the past.  It's even larger than the purple piece, which is a bit unusual for me.  It just kept growing as I worked.  I really like the "home-grown" leaf tassel on this one in particular.  Lots of motion!

Sunday, December 2, 2012

Mokume Gane Cylinder Pendants

I really liked the cylinder pendants I made a few weeks ago, and decided to make some more in different surface treatments.  I first turned to mokume gane. It's one of my favorite techniques, possibly because every time I use it, the end result is different. The color combinations are usually custom-made, and I vary the objects I press into the polymer stacks, so I always get an unique look.
The pendants on the left demonstrate 2 different impression techniques.  On the purple and pink cylinder, I used a deep cut rubber stamp to make the impression in a rather shallow stack.  The aqua cylinder was made from  a tall stack that included composite silver metal leaf.  I used a variety of metal and wooden objects pressed into the stack to create the pattern.  While the left pendant was hand sanded and buffed for a satin shine, the pendant on the right has a coat of acrylic varnish.  When I use metal leaf in pieces, I like to add a protective coating to guard against possible tarnishing of the metal.

The pendants on the right also represent different techniques.  The red and white pendant has layers of gold composite metal leaf sandwiched in translucent, with a design created from curved metal bands and hollow tubing.  Rubber stamps were used for the patterns in the other two pieces.  These pendants are fun to wear and the metal tassels add a touch that swings as you move.

I'm in the midst of another surface look in cylinder pendants - stay tuned!

Saturday, November 17, 2012

A Rafter of "Dichroic" Polymer Pendants

I learned recently that a group of turkeys is called a rafter.  Since it's close to Thanksgiving, and I have a big group of pendants to share with you, I decided to call them a "rafter" of pendants.  ;)

About a week ago, I shared here a bit about the processes I've been trying with metal leaf, alcohol inks,  and polymer.  In the last few days, I've been trying more experiments. The first thing I tried was to add a very thin layer of translucent clay mixed with pearl glitter, and then to impress the layer with a texture design.  Alcohol inks were added last. Above are two of my first pendants pieces.  You can see the a bit of the gold metal leaf through the translucent layer. The translucent-glitter layer adds a special sparkle that has an effect somewhat like dichroic glass.  It doesn't show well on the screen, though it really sparkles in person.

I made some striped sheets from the larger sheet, and then created a variety of pendant shapes.  These pieces and the ones above were all made using Pinata Alcohol Inks.  I find these colors to be very bright and colorful and almost intense.

I decided to see what Adirondack Alcohol inks might do in using the same techniques.  Here is my favorite piece from the Adirondack set:

The next set is also from the Adirondack sheet. The colors look more colorful on my computer screen than they do in person.  I was surprised to notice that, when compared to the Pinata ink pieces, the Adirondack colors are more subtle and darker.  The Pinata colors look like spring and summer colors, while the Adirondack colors come across more as autumn and winter.


I made several other pieces in Adirondack colors that were focused on a "fall theme."   The last photo shows some pieces from this last set. I tried inclusions in a couple of the pieces - pearls and a black rectangular crystal.

Friday, November 9, 2012

Rainbows & Stripes

Continuing on with my metal leaf and alcohol ink experiments....After the blue shades, I decided to try adding more colors on the silver leaf.  I added pinks and reds to the blues first, and came up with the pendant on the left.  I really like the way the colors pool where they meet, making areas that look black and add excellent contrast. The sterling silver piece just seemed to want to be there.
Then I went wild with colors.  This was such fun, and I loved the rainbows that developed.  It is important to avoid putting opposing colors next to each other in order to avoid "mud."   Here are some pieces of the rainbow.
I had a few bits and pieces from the two silver metal leaf sheets I had made. They weren't large enough to do anything on their own, but I loved the colors and didn't want to just toss them.  So, I tried my hand at my first clay collage.  I think this is my favorite piece from all these first experiments.


I made one more rainbow sheet and cut the sheet in strips to make the striped pieces at the bottom. They're bright and vibrant.  Once again,  I think the piece I like best in this last collection is the triangular piece with the irregular slices.  I'm going to have to do more.  Playing with color is just too much fun!

Thursday, November 8, 2012

Blues & Silver


For my next metal leaf and alcohol sheet, I used silver leaf and the metal layer, and stuck with blues and purples.  I love the way the colors pooled, and I kept adding small drops on top of each other to see what would happen.  I love the effect!  This is really the first time I've played with alcohol inks on metal leaf, and it really is fun.  Once the sheet dried overnight, I decided not to crackle it so did not cover it with a layer of translucent clay. The colors stayed more vibrant this way, but it meant I needed to find another way to protect the metal leaf from wear.

I mounted the dried sheet on a sheet of black clay, cut out various shapes, and baked them.  I sanded the edges of the baked pieces, then added a thin strip of black clay around the edges to create an outline and bezel.  This was baked.  Then I added epoxy to the surface.  This protects the metal leaf, enhances the colors, and adds great depth and shine.  I used Magic Gloss and had to add a few layers to get the results I wanted.  I'm pleased with the end result.

Unfortunately, I did discover I'd made a major error.  I'm used to multiple bakings, so just planned on adding bails, pin backings, and other clay or metal findings in subsequent trips to the oven.  What I didn't think about was the fact that the epoxy layer could not be baked at oven temperatures.  If you try, you end up with lots of ugly dark boils and bubbles.....very, very sad :(  I ended up having to drill or use epoxy glue to attach findings to many of the pieces.  Some of them aren't finished the way I would have liked, so this was definitely a lesson in pre-planning!

Wednesday, November 7, 2012

Experiments with Metal Leaf & Alcohol Inks

In my last post, I included a couple of photos showing new pieces with metal leaf and alcohol inks.  These are new surface techniques for me, and I thought you might be interested in seeing the progression of my experiments which have covered several days.

So, let's go back to where I began.  I wanted to try making a couple of polymer cabochons, and I wanted an antiqued and crackled look.  I started with a black clay base, layered on gold composite metal leaf (not foil) and then used alcohol inks to color the metal leaf.  I used Pinata brand colors, and loved the way they blended as they ran into each other.  Since the metal leaf was still exposed, and I wanted to be able to bend the sheets to create crackling, I covered the sheet with a very thin layer of translucent clay.  I ran the resulting sheet through the pasta machine a couple of times in different directions until I liked the look of the crackle.

 I formed a few cabochon bases, and covered the tops with pieces from the prepared sheet.  I baked these, then added a sheet of black clay to the back of the cabochon, and a narrow strip of black clay around the edges to create an outline or bezel look.  After these were baked, I sanded a great deal, but found that the color was still  clouded by the translucent clay.  I decided to try using an acrylic varnish designed for polymer.  A few layers made things shine and brought out the colors and the detail.  As a last step,  buna cording and clasps were added to create necklaces.

Wednesday, October 31, 2012

An Oriental Frame of Mind

There is something about oriental style that has always appealed to me, even when I was a child.  I've been meaning to try my hand at some cylinder bead for quite a while, and finally sat down to do just that.

This is the first bead I made.  I impressed texture into the clay, then formed the tube. After an initial baking, I applied a dark mix of acrylics to enhance the design, and baked the piece again to set the acrylic.  The end caps are made from circles of clay and wired to the tube core to ensure strength.  The metal chain tassel seemed just the right touch.

Then I decided to use black and translucent clay decorated with gold metal leaf, alcohol inks, and permanent black archival ink.  The red and green cylinder beads were my first results.  I do like the metal tassels.


I still had some of the decorated sheet left, so made another gold and red cylinder bead, and then decided to make a large pendant.

 I really like this piece. The colors are deeper in person that the photo indicates.  I'm going to have to play some more with these shapes and decoration techniques.  I've only just "scratched the surface."

Thursday, October 25, 2012

Using Molds

Molds - they have a wide variety of applications, but for some reason I rarely use them.  Perhaps it's because I enjoy manipulating the clay so much myself that I don't even think about molds.  I did use them when I first worked with silver precious metal clay.  That clay is so expensive, dries so quickly, and cracks so easily that molds enable users to make some really lovely shapes and nice pieces without a loss of the clay.  Polymer is totally different.  I can work and re-work something until it's just the way I want it, and I don't have to be concerned about cost or the medium "wearing out" before I'm done.

All this said, the other day I was making small Skinner blends in fall colors.  I wanted to make some leaf earrings with the fall colors blending into each other.  Somehow, though, when I had the blends made, I just really didn't want to make them into canes and slices...Looking through supplies, I happened upon a leaf mold, and the idea struck - why not give the mold a try?

So, here are some results.  The colors mimic those on the trees in my yard, the shape is fun and interesting without overpowering the colors, and there are posts and dangles to choose from. It's all very "Fall."

Wednesday, October 17, 2012

Making "Connections"

As I've mentioned before, I really enjoy creating with different techniques. Usually, I then make lots of different pieces, but not often do I create jewelry in which multiple pieces of polymer are combined together.  So I've tried a few different ideas in which multiple pieces of polymer are connected in some way.  Hence, the title of this post:  "making connections."

This fall-color-based necklace is composed of circle shapes which are connected to each other through a simple wire method.  The wires have been covered in the back so the effect against the neck is smooth.  There is a lot of motion in this piece, since each circle moves independently of the others.

The red-black-white mokemu gane piece has jump ring connections, so again the piece has movement.


The last piece is composed of mobius shapes made from a celtic knot cane, then strung into a necklace with faceted beads.


Thursday, October 11, 2012

Southwest Color & More Extrusions

I've just returned from a vacation trip to the Southwest. We were primarily in Arizona, though we touched Colorado and New Mexico, too.  Traveling through the painted desert, the canyons, and the cliffs had me reveling in color.  The reds, pinks, purples and blues are both subtle and intense.

It's all so very different from what I'm used to here in New England.  The trees are in their glory, and their colors are vibrant right now as fall takes center stage.  Color is one of the things I just love about nature - and about polymer!  So, I had to start claying as soon as I got home.
The photos here play on the southwestern color theme.  I'm still having fun with extrusions, as you can see.  I used copper and browns, along with various shades of turquoise and blues, and just a touch of cream.  The cream layers in the desert really set off the reds and blues.  Amazing.

I hope the colors give you a taste of what I've just seen. The bracelets are from a slightly different color mix - more brown than copper, more teal than turquoise.  See why I love color!?!

Thursday, September 27, 2012

Textured Ferns

Here are some more pieces along the leaves-and-autumn theme.  I used vinyl wallpaper textures on the back and front of the gently curved bases.  The 3-D ferns in the pendants are quite textured, and I used Ikat canes to reflect the changing and widely varied colors of fall.


The earrings are double layers of leaves with pearl embellishments.

Wednesday, September 26, 2012

It Must Be Fall....

As I walk through the woods here in Connecticut, I'm surrounded with leaves: leaves starting to turn colors on the trees; leaves drifting through the air; crisp leaves beneath my feet.  Of course, this means I return home with the need to put some of these colors and shapes in clay.  Here are some pieces using real leaves to develop the focal point. Pearl ex powders add color and a metallic shine. The first group are all pendants.

The second photo has two pieces which are larger than the others so I used findings to turn them into pins.  I especially like using a convertible pin/pendant finding so make these pieces more versatile.  These pieces are based on a technique first introduced by Mike Buesseler.

Tuesday, September 25, 2012

Bamboo Leaves

A little cane I made looked like a collection of bamboo leaves to me, so I decided to try a couple of pieces with a bit of an oriental flare.  The first piece is a pendant and is sort of a collage.  It includes  the bamboo leaf cane, textured solid colors, a floral transfer with resin, and even some gold metallic thread.

Then I made another image transfer with a resin dome, and embedded it within the bamboo leaf cane.  The resulting piece begged to be a necklace complete with buna cording.  The small rectangular piece is a slide that allows the cord to lengthened or shortened.

As usual, I needed to make some earrings.  These two pair have a totally different "feel", even though they both use the same cane.


Sunday, September 23, 2012

Gingkos Galore

  As I've said before on this blog, I love leaves.  I love their shapes, their textures, their colors and their infinite variety.  Gingkos are one of my favorite leaves. Their shape is unusual, their history is unique, and their medicinal properties are wide and varied.  So what could be better than gingkos of polymer?


I was delighted when Lynne Ann Schwarzenberg published her gingko cane directions in the April, 2012 issue of Polymer Clay Cafe.  The cane is fun to create, and the resulting leaves are as varied as you make them.  As you can tell from the photos here, I've finally made  some canes and created my own finished shapes.


The two pieces below are pins.  One a cascade of gingkos, the other a swirl of leaves.

The group above has pieces made from a different cane - one in more muted colors and slightly smaller shapes.  The leaves in the three-piece pendant on the left swing and move individually.

Sunday, September 2, 2012

Woven Chevrons

 Something else new for me!  I seem to be in a "try-new-techniques" phase.  Sometimes I really like just getting immersed in a particular style or approach, and other times, like now, I have the impulse to give new and different ideas and techniques a "try out."

A few months ago, I saw some of the lovely pieces Judy Belcher put together using what she calls "micro knitting."  Craft-edu was my source for Judy's online class - a clear, well-organized presentation, with lots of options.  Once you understand the process, how you apply it is all your own.


So here are my first pieces.  There are several weaving variations which I'll need to try.  It's a very precise technique, and it was fun to watch the "fabric" grow.

Thursday, August 30, 2012

Ripple Blade Mokume Gane

The Southern Connecticut Polymer Clay Guild (SCPCG) held their bi-annual conference in late July.  This wonderful event spanned 4 days in which participants played with clay, explored new ideas, participated in various contests and activities, and enjoyed the camaraderie of like-minded friends, both old and new.
There were excellent demonstrations scattered throughout the conference, which were open to all though not mandatory, so one could pick and choose or go to everything. It could be a hard decision - continue what you were doing, or go learn about something new. What a great choice to "have" to make.

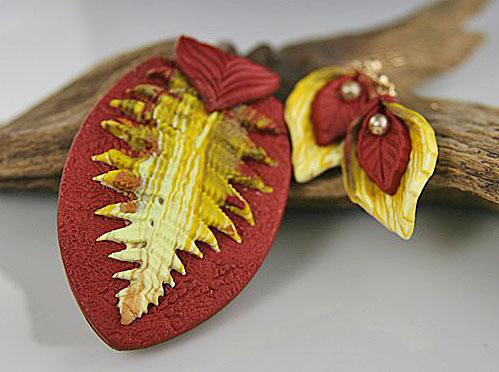
 This year, many of the demos were focused on Mokume Gane techniques, of which there are many.  Though I'd tried several approaches on my own in the past, I had not experimented with the ripple blade technique.


Libby Mills presented a clean and clear demonstration of her own refined version of this technique.  Those of us who saw the demonstration couldn't wait to get back to try it out!

Basically, there are two major patterns which emerge - zigzag stripes or a more dotted, mottled look. I played primarily with the stripes and have finally finished up a couple of pieces to share here.  When I get some "spots", I'll share those, too.


These two pendants have the zig-zag mokume gane base with the tiny dried flowers on top, all encased in resin.  I love the way the resin makes the background seem to almost move.